Sunday, July 1, 2012

Lemons & Leftovers Sale at Homestead Handcrafts!

Join us for a Lemons & Leftovers Sale at 

Homestead Handcrafts, July 6 - 15!


Vendors like us will be reducing items to make way for new merchandise! Look for markdowns in green ink. Enjoy complimentary lemonade, lemon treats and lots of great deals! For more information, call Homestead Handcrafts at (210)637-1842.

Tuesday, June 12, 2012

Two loves: Louis Blue and Old White

Louis Blue and Old White - what a purr-fect combination! I wanted to share another transformation using Chalk Paint (TM) Decorative Paint by Annie Sloan. I purchased this cherry wood-ish display cabinet and the local GW for $4.99 plus tax. Yes, $4.99 plus tax!
If you look closely you will see the mirrored backing along the shelves. I had already pulled off the drawer when I took this photo. The piece was in need of some lovin as you can see it had been neglected and was dirty, dusty and a little beat up. A good cleaning was all she needed and she was ready for some Chalk Paint (TM)!

Here she is after two coats of one of my favorites - Louis Blue. I knew when I saw her what colors I would use. I painted the entire piece Louis Blue. I couldn't wait to paint the accented areas with Old White. With Chalk Paint (TM) I didn't have to wait long at all to do so. The multi-tasker that I am, I was painting another piece while the Louis Blue piece was drying. By the time I freshened up my drink, added some more mosquito spray and "powdered my nose," I was ready.

I likey! I probably could have only applied one coat of Old White but added a second anyway. The paint drys so fast it was not a big deal to do so. I could hardly wait to get to the next step - distressing. First, I applied one coat of clear wax over the entire piece. I used my new Wax Brush by Annie Sloan (TM). Love, love, love these brushes. It is worth every penny I paid. I can't say enough about the ease of using the brush with the Soft Wax - goes on like butta! (You're worth it! Invest in one and you'll be hooked.) With a 60 grit sandpaper, I lightly distressed the areas that would naturally wear.
A second coat of Clear Wax went on. When applying the second coat, sometimes if you apply only to the distressed areas that is all that is needed. In this case I wanted to be sure the shelves (which will be used for collectibles and such) had a second coat. I knew I wasn't quite finished. Using an old white sheet to buff has really worked for me. No lint or mystery fuzzies to be seen anywhere. On to the final step - Dark Wax. 

I lightly applied Dark Wax to the Old White accented areas using another Brush by Annie Sloan. You want to be sure to use separate brushes for the Clear and Dark Waxes to avoid mixing the two. I got a little heavy handed for my taste and went back with a little Clear Wax to easily remove the excess.

See the beauty of Dark Wax? It aged the piece in a natural way. Here she is at our booth, The Shabby Chicas located at Homestead Handcrafts on Thousand Oaks.

Tell us about your Louis Blue and Old White love story! We'd love to share your photos!


--The Shabby Chicas


Sunday, June 3, 2012

Chest of Drawers Transformation with Annie Sloan Chalk Paint

I took out this chest of drawers from my garage of countless projects waiting to be tackled. The blue and white color on this piece was too hard-edged and 70's for me. My goal was to soften the look of the piece so it would be more contemporary looking. I chose the Annie Sloan Chalk Paint decorative paint color Duck Egg for this soon to be beauty.

The first thing I needed to do was to remove the shelf paper that the drawers were lined with. Okay the paper was on there good, as in, hurricane-strength-proof. I needed to surgically remove paper with exacto knife in hand to catch the edges of the paper and then tear this stuff off little by little. This can be doubly frustrating when you are outside in 98 degree Texas humid weather. I then removed the wooden knobs from the drawers because I wanted to replace them with nice glass knobs to the give the piece an added touch.
I applied 2  coats of Annie Sloan paint to the entire piece. Drying time is fast with Annie Sloan paint so I was able to apply the clear wax after 1 1/2 hours. After clear waxing was done I then added touches of dark wax to the entire piece. I used the new medium size Annie Sloan brush that I just got. I used gentle light strokes to the surface to just give a hint of aging.

I like to wait at least 24 hrs. for waxes to thoroughly dry. In the meantime, I went out to buy the piece de resistance glass knobs. There is something about adding cool knobs to furniture that really puts your piece over the top. Unfortunately, the knobs did not work out as well as I thought. For some reason, the screws for the knobs were too long, therefore they fit very loosely. I was so disappointed that I wanted to cry. Besides, I had spent a small fortune on the knobs. Lucky for me that I have a wonderful brother-in-law that came to the rescue. He suggested that I add #8 flat size washers to the screws. Wow, what a difference...the knobs fit nice and tight after that.

I think she turned pretty good dressed in her glass knobs!!!
 

Sunday, May 20, 2012

The Love of Vintage Metal Porch & Patio Furniture!

The Shabby Chicas were busy today stocking, arranging and re-arranging our booths today at Homestead Handcrafts on Thousand Oaks (San Antonio, Texas). We arrived at 11:00 a.m. or so and did not plan this but wound up working until closing which was at 5:00 p.m.! Whew!

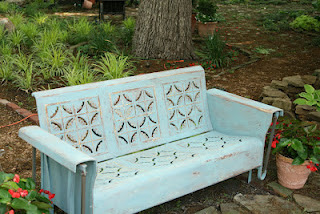
Our top salesperson (a.k.a. 86 year-old mom) scored these two very cool vintage porch chairs. Well, we moved this and that to fit them in along with two other pieces of furniture and a lot of smalls.
We just love the original color on these and they are in such great condition too! Priced at only $48 each, they are sure to go quick.

Vintage metal porch and patio furniture is so cool, built well and can often be used inside too. We love to surf the 'net to see what others are doing with their vintage pieces. We recently ran across Lady Butterbugs' blog about a super cool vintage glider she painted! That's right, she chalk painted it! Sweet.
Click on the link here to read more about Lady Butterbug's inspiring process. We have a vintage bench very similar to this in our inventory and have been contemplating painting it too with Annie Sloan Chalk Paint. Not sure what the original color of our piece is but it was painted a dark red. To paint or not to paint? What would you do?


Sunday, May 6, 2012

Country Grey Oak Table Transformation

I have read where Annie Sloan Chalk Paint is known as a "girl's paint." I can attest that it truly is the "working girl's paint." Maintaining a full-time job whether it's in the office or in your "home" office, finding the time to do your picking and tending to your family is not always easy. Albeit I have several four-legged children (not the two-legged fussy kind) it's sometimes more than this Shabby Chica can manage. That's when I turn to Annie Sloan Chalk Paint to lose myself in the wonderful world of color. With the wand of my paintbrush, I can turn an ugly duckling into the belle of the ball in as quick as 1 day!  And the best part is...wait for it...I can do it inside the house when the husband is out of town for a couple of days and he will never know!  (Uh oh, hope he doesn't read this blog. Oh, well. I'll worry about that tomorrow.)

Here's a picture of  a cute little oak table I picked about a month ago for $20. I love the legs on this.

I had wanted to try Annie Sloan Chalk Paint in Country Grey and thought this piece would be perfect for it. I started this project Friday evening about 7:00 p.m. I painted one coat on and in about one hour it was very dry and I put the second coat on. I had started another project during the hour--pics of that project will be coming soon. The chalk paint is not messy to use and if you do have an oops, it is super easy to clean up. 
 I took this picture at about 9:30 p.m. on Friday. The second coat was still drying and the color is actually a darker than what appears to be in this picture. Country grey seems like a light khaki to me. I had to work on Saturday during the day so I put the first coat of Annie Sloan Clear Wax on when I got home which was about 6:30 p.m. After about an hour I buffed the wax and then did a light distressing with sandpaper. I used a moist paper towel to absorb the small amount of dust from the sanding I was doing inside house! This worked very well. I then reapplied Clear Wax on the top of the table and the distressed areas. I have found that using white sheets to buff works very well for me. Other cloths used such as old t-shirts, rags and even a buffing pad on my sander did not work out so well. It seemed that I would always see little particles on the finished product. So far, the sheets are particle free and leave a nice smooth finish.


I was able to get the table to the shop first thing Sunday morning. I would estimate the total time on this project to be about 5 hours! It used to take me two weekends to finish a project. One weekend to sand, prime and prep and the second to paint and wax. With Annie Sloan Chalk Paint I have been able to cut that time down drastically. What will your next (or first) Annie Sloan project be?

--The Shabby Chicas

Tuesday, May 1, 2012

Reloved Rubbish: Graphite and Old Ochre Desk

We're sharing a link to a fabulous Annie Sloan project by Reloved Rubbish.  Love this...

Reloved Rubbish: Graphite and Old Ochre Desk: A couple that took one of our Chalk Paint workshops at Loot asked if I would redo their desk and  try to sell it.  The desk is a great...

Tuesday, April 24, 2012

Celebrate Fiesta at Homestead Handcrafts!


*****VIVA FIESTA***** 
HOMESTEAD HANDCRAFTS 
FIESTA EGG HUNT
COME JOIN IN THE FUN!!!!!!
DRESS IN YOUR BEST FIESTA ATTIRE
****FIND AN EGG AND 
GET A GREAT PRIZE****

Be sure to ask for The Shabby Chicas booth!

Friday, April 27 and 
Saturday April 28
10:00 a.m. - 6:00 p.m.
Homestead Handcrafts
4536 Thousand Oaks
San Antonio, Texas 78233